April 18, 2026 • Declan Harte • 9 min reading time • Specs verified June 5, 2026
Field-Test Before You Buy: Signal Meters and dBm Readings That Prevent Booster Regret
You’ve probably felt it — one bar of service at your kitchen table, full bars on the front porch. That gap is real, measurable, and fixable. But here’s the part most buyers skip: before you spend anywhere from $150 to $1,200 on a signal booster (a device that captures weak cellular signal from a nearby tower, amplifies it, and rebroadcasts it inside your space), you need to know what signal you’re actually starting with. Signal strength is measured in dBm — “decibels relative to a milliwatt” — a number that typically runs from about −50 dBm (excellent, close to a tower) down to −120 dBm (barely functional, one step from no service). The lower (more negative) the number, the weaker the signal. A booster can multiply what it receives, but it cannot create signal from nothing. Five minutes of reading your phone’s engineering screen — or walking your property with an inexpensive meter — can tell you whether a booster will transform your situation or simply disappoint you. This guide shows you exactly how to take those readings, what they mean for your purchase decision, and where the math actually lands.
Why Your Bar Count Lies to You (and What to Measure Instead)
The bars on your phone’s status display are a marketing abstraction. Each carrier maps its own dBm thresholds to bar counts differently, and the mapping can change with software updates. PCMag’s explainer on how to test cell signal notes that two phones standing side-by-side on the same network can display different bar counts while receiving identical signal levels — because the visual display is a smoothed, carrier-tuned estimate, not a live measurement.
dBm is the honest number. Here’s how to read it on the two most common platforms:
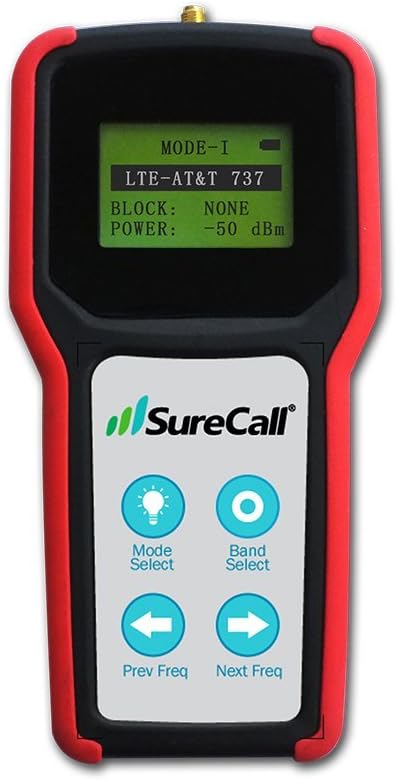
On iPhone: Go to Settings → Privacy & Security → Location Services — actually, the simpler path is to dial *3001#12345#* and press Call. This launches Field Test Mode. In iOS 16 and later, tap “LTE” or “5G” in the serving cell panel. Your RSRP (Reference Signal Received Power — the per-antenna signal strength reading that matters most for boosters) will appear as a negative number, typically between −50 and −120.
On Android: The path varies by manufacturer, but the most reliable route is Settings → About Phone → Status → SIM Status, where “Signal Strength” appears in dBm. On Samsung devices running One UI, Settings → About Phone → Status Information shows it directly. Third-party apps — Network Cell Info Lite is widely recommended across aggregated app-store reviews — display a live dBm map as you walk, which is far more useful for a site survey than a single static reading.
The number to write down is your outdoor dBm at the spot where you’d mount an exterior antenna — typically a rooftop, exterior wall, or a pole clear of obstructions. That number is your “outside signal,” the raw input every booster calculation starts from.
The dBm Decision Matrix: What Your Reading Actually Means
Once you have your outdoor reading, you can map it directly to booster requirements. This is where most buyers make their mistake: they look at indoor readings, see −105 dBm, and assume they need the most powerful booster on the market. The outdoor reading at the proposed antenna location is the number that determines which booster class can help you — and by how much.
By the numbers — outdoor dBm and recommended booster tier:
| Outdoor dBm (RSRP) | Signal Description | Booster Tier That Makes Sense |
|---|---|---|
| −50 to −75 | Strong | Entry-level ($50–$150 cradle or desktop) |
| −75 to −90 | Moderate | Mid-range whole-home (~$350 weBoost Home MultiRoom) |
| −90 to −100 | Weak | High-gain residential (Cel-Fi GO X ~$700, or weBoost Installed Home Complete ~$1,000 installed) |
| −100 to −110 | Very weak | Maximum-gain units only; professional antenna placement critical |
| Below −110 | Near-threshold | No consumer booster will produce consistent results; carrier network issue or terrain-blocked path |
Waveform’s signal booster buying guide frames it plainly: if your outdoor reading is below −110 dBm, you’re likely fighting a path-loss problem that amplification alone cannot solve. The better path at that point is a directional Yagi or log-periodic antenna aimed precisely at the tower, combined with the highest-gain booster your budget allows — and even then, realistic expectations matter.
For the mid-range sweet spot — outdoor readings between −85 and −100 dBm, the situation most suburban dead-zone owners and rural homeowners actually face — the gain math is worth doing explicitly. The weBoost Home MultiRoom is rated at up to 65 dB system gain. The Cel-Fi GO X is rated at up to 100 dB gain (though Cel-Fi’s architecture uses automatic gain control that self-limits based on outside signal, so that 100 dB figure applies only in conditions where the system determines it’s safe to run wide open). SureCall’s technical documentation on reading dBm explains that usable indoor improvement in a typical installation is commonly 20–30 dB after accounting for cable loss, antenna placement imperfection, and building attenuation — meaning a −95 dBm outdoor reading realistically delivers −65 to −75 dBm indoors, which is solidly functional for voice and LTE data.
The Walk-Survey: Two Tools Worth Owning Before Any Major Install
If you’re speccing a whole-home install, a commercial buildout, or a multi-acre rural property, a single-point phone reading isn’t enough. You need a walk-survey — a systematic dBm reading at multiple points — to find the best antenna location, identify competing signal paths (useful for multi-carrier setups), and document your baseline before installation so you can verify the booster’s actual improvement.
Tool 1: Your phone in Field Test Mode, with a note-taking app open. This is free and sufficient for residential single-family installs. Walk the perimeter of your roof (or the exterior walls, if rooftop access is difficult), take readings at each corner and the midpoints, and note which direction corresponds to the strongest reading. That direction points toward your nearest tower — and that’s where your exterior antenna should face. The FCC’s consumer guidance on wireless signal boosters confirms that antenna aim relative to the serving tower is one of the most consequential installation variables, and it costs nothing to get right.
Tool 2: A dedicated RF signal meter. Purpose-built meters like the Cel-Fi WAVE app (which pairs with Nextivity hardware) or handheld units available through specialty retailers like Waveform or Powerful Signal display per-band RSRP readings live, without the carrier-software smoothing that makes phone readings occasionally lag. For commercial and enterprise installs — office buildings, warehouses, hospitality venues — facilities directors and IT managers consistently note in long-run deployment reviews that a proper pre-install walk-survey with a band-specific meter prevents misaligned antenna placement, which is the single most common reason a Wilson Pro 70 Plus or SureCall Fusion5X install underperforms its spec-sheet potential. A meter that costs $50–$150 pays for itself by preventing one unnecessary antenna repositioning visit at $200–$400 in labor.
What to document in your walk-survey log:
- Location (GPS coordinates or a simple sketch with compass orientation)
- Carrier network tested (AT&T, T-Mobile, Verizon)
- Band detected (B12, B71, n71, etc. — most field test apps show this)
- RSRP in dBm
- Time of reading (signal can vary with tower load — morning readings differ from evening)
- Obstructions noted (tree line, metal roofing, hill, neighboring structure)
This log is also exactly what specialty retailers like Waveform and Powerful Signal ask for when you call for pre-sale design help. Showing up with documented readings, not just “my signal is bad,” shortens the consultation and gets you a more precise recommendation.
The Separation-Distance Check: The Reading That Prevents the Most Common Failure
There’s one more measurement that belongs in every pre-install process, and it’s the one most DIY buyers skip entirely: the separation distance between your exterior (donor) antenna and your interior (broadcast) antenna.
Boosters amplify signal. If the interior antenna’s broadcast reaches the exterior antenna — which it will if they’re too close together or aimed at each other — the system creates a feedback loop. The booster detects its own output as input, goes into oscillation-suppression mode, and automatically reduces its gain. Owners consistently report this as “the booster doesn’t seem to do anything” — the unit is working correctly, it’s just suppressing itself.
CNET’s booster buying advice and weBoost’s own published documentation both specify that vertical separation (exterior antenna on roof, interior antenna on a lower floor) is more effective than horizontal separation, because building structure attenuates the feedback path. The recommended minimum is typically 20 feet of vertical separation or 50+ feet of horizontal separation, but for high-gain units like the Cel-Fi GO X or Wilson Pro 70 Plus, more is always better.
Measure this before you finalize your antenna placement plan. Walk the proposed cable run, estimate the actual distance, and if it’s marginal, move the interior antenna further into the building — even if that means a longer cable run and slightly more coax loss. A 1–2 dB loss from extra cable beats a 10–20 dB self-oscillation penalty every time.
The “If X, Then Y” Decision Rules
After the walk-survey and separation check, the purchase decision should be mechanical:
If your outdoor dBm is −75 or better: Almost any booster will produce a noticeable improvement. An entry-level unit is appropriate. Save money here and spend it on antenna quality instead.
If your outdoor dBm is −85 to −100 and you need whole-home coverage: The weBoost Home MultiRoom ($350) is the right starting point for a 1,500–3,000 sq ft home. If your home is larger, older, or has metal roofing or concrete construction, move up to the weBoost Installed Home Complete ($1,000 installed) — the professional antenna aim and cable management alone justify the premium at this signal level. CNET’s booster coverage notes that professional installation consistently outperforms equivalent DIY hardware in weak-signal environments.
If your outdoor dBm is below −100: Buy the highest-gain unit in your category (Cel-Fi GO X for residential, Wilson Pro 70 Plus or SureCall Fusion5X for commercial), use a directional Yagi exterior antenna aimed precisely at the tower, minimize cable run length, and consider calling Waveform or Powerful Signal for a free pre-sale consult before ordering — their antenna placement guidance at this signal level is worth more than any price discount you’d find elsewhere.
If your outdoor dBm is below −110 at every exterior point you tested: Stop. The booster conversation pauses here. Investigate whether a carrier network issue, terrain blockage, or tower capacity problem is the root cause. A booster cannot solve those problems, and the FCC’s consumer guidance is explicit that boosters require some ambient signal to amplify. Document the readings, contact your carrier with specifics, and revisit the booster decision after you’ve confirmed the signal path problem is one amplification can actually address.
The five minutes you spend taking these readings before you buy is the best insurance policy available against the most expensive version of booster regret: returning a $700 unit because you didn’t know your outdoor signal was −112 dBm to begin with.